Powerpoint tutorial: 6 creative ideas for morphing animation
The morph transition lets you create smooth, modern animation within minutes.
This useful feature is unfortunately somewhat hidden in the depths of the software’s interface, making it way too underused by many Powerpoint users.
And that’s precisely what motivated Pokeslide to create a how-to guide for using animation through morph transitions! This tutorial is composed of several useful and creative case-studies to boost your presentations.
So open your Powerpoint and enjoy this read! 😉
ZOOM-IN EFFECT

CAROUSEL EFFECT
PARALLAX EFFECT

PROGRESSION EFFECT

SLIDING EFFECT

FOCUS EFFECT

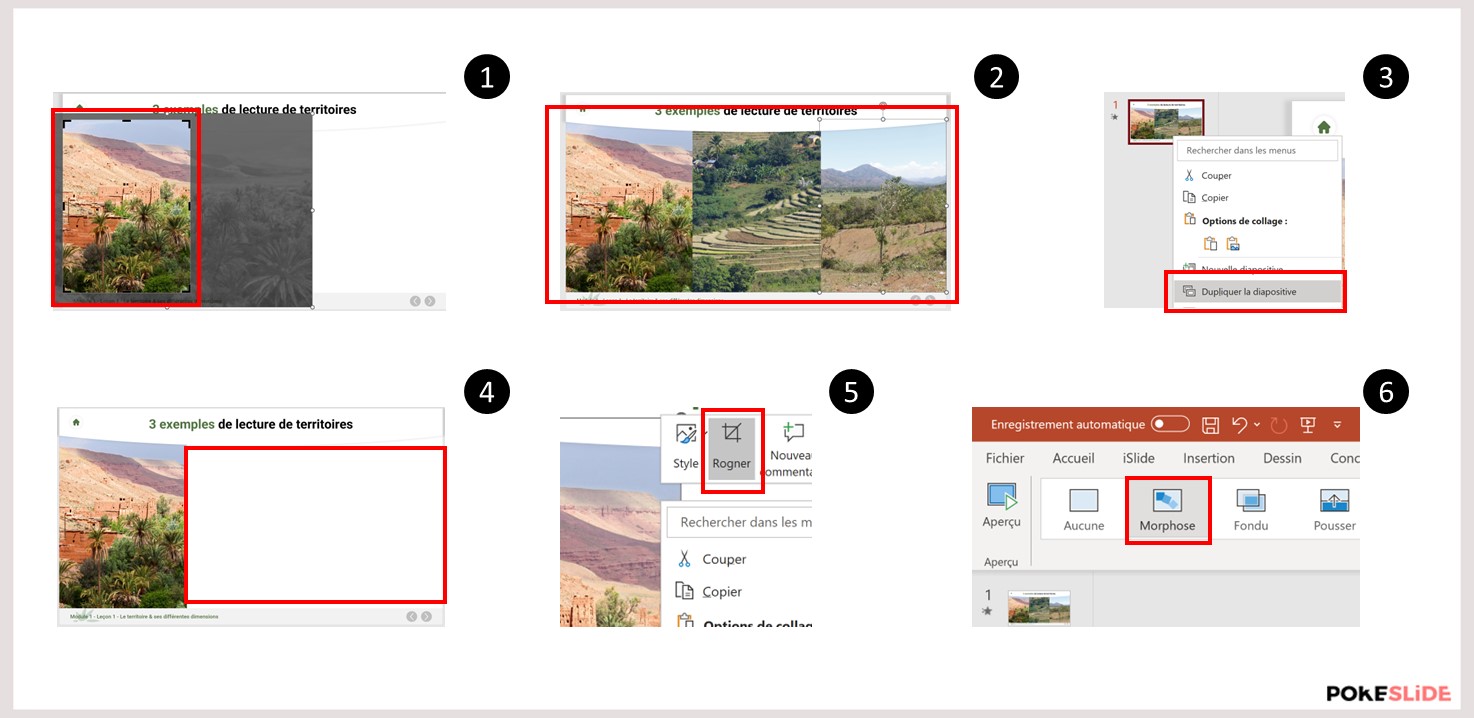
ZOOM-IN EFFECT
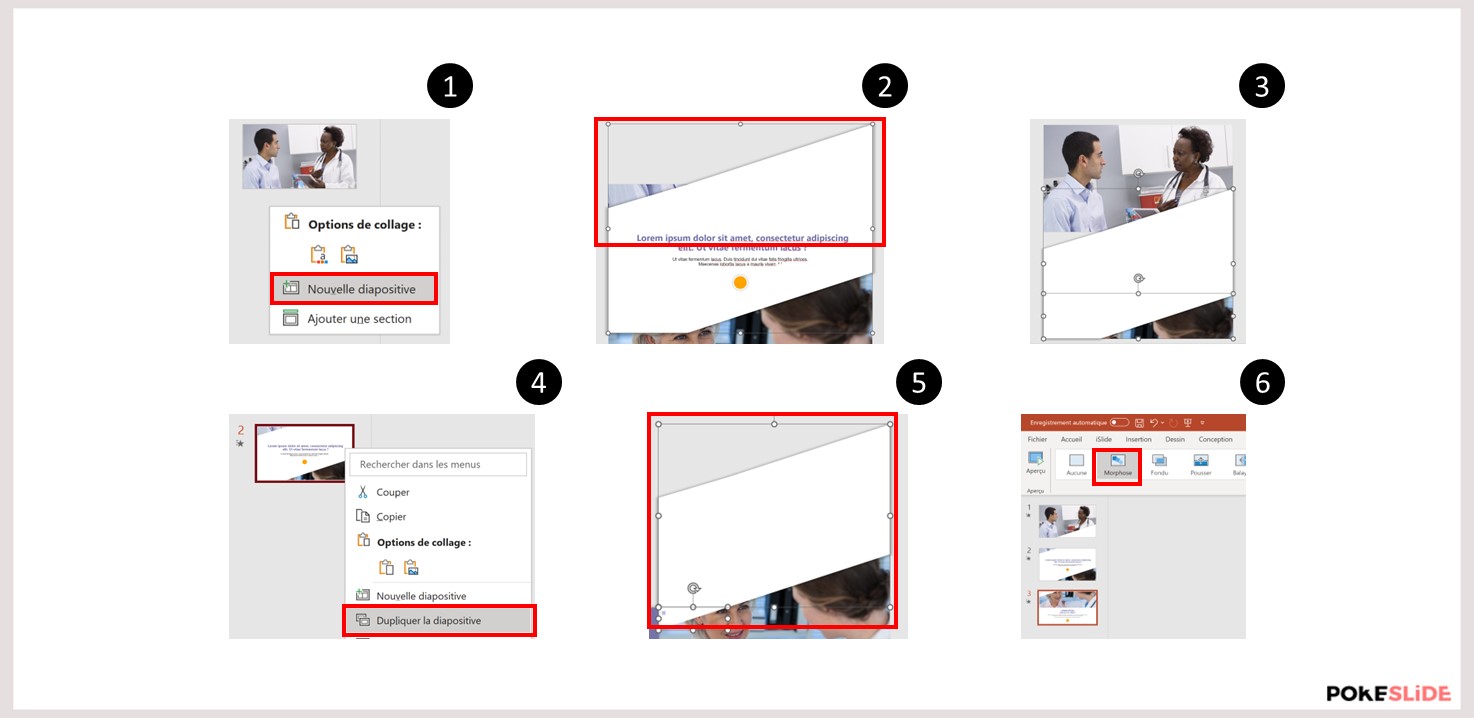
A zoom-in effect allows you to enlarge the size of an image to accentuate the effect of immersion.
It’s a smooth, modern transition that’s easy to pull off.

1. Start by cropping the image to the desired format
2. Duplicate that image to obtain a group of 3 images
3. Duplicate the slide
4. On this new slide, delete the two images on the right
5. On the remaining image, use the crop function to make the image full screen
6. Add a block of text
7. Select Morph Transition
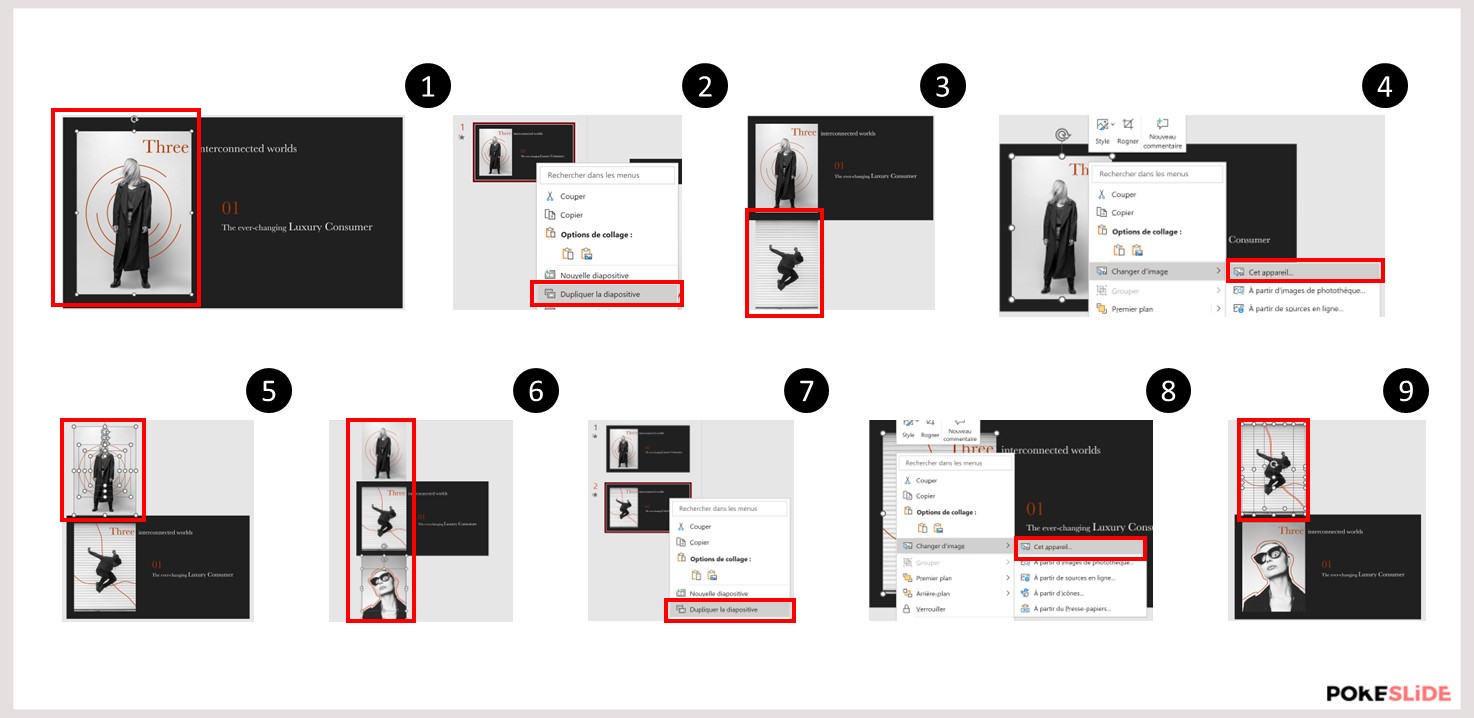
CARROUSEL EFFECT
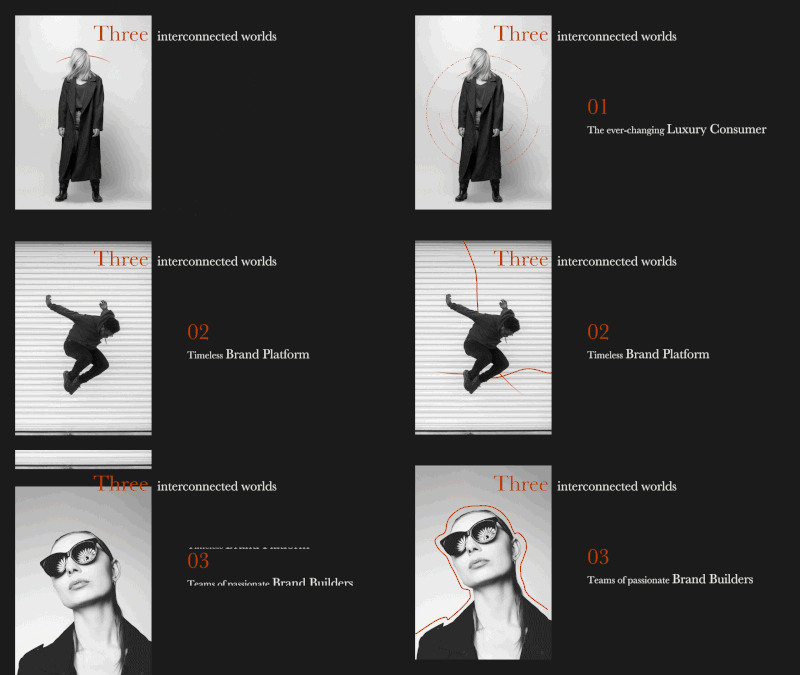
A carousel effect allows you to add a scrolling of an image or an object on a transition. This transition is multidirectional, that is, scrolling can be done from all directions.

1. Start placing your first image in the desired location
2. Duplicate the slide
3. On the new slide, replace the image
4. Copy and paste the previous image on the slide
5. Place the image above the new image, outside the slide
6. Repeat this process
7.Paste the following image under the image being viewed, outside the slide
8. Select Morph Transition
PARALLAX EFFECT
A parallax effect allows you to create a scroll type effect. The two elements used appear with different timings to create fluidity in the transition.

1.Start by placing your first full screen image
2. Duplicate the slide
3. On this new slide, create a shape on the image that goes beyond the slide’s frame
4. Duplicate the slide again
5. Place the shape above the slide, making it go slightly beyond the slide
6. On the first slide, place the shape below the slide, making it go slightly beyond the slide
7. Select Morph Transition
PROGRESSION EFFECT
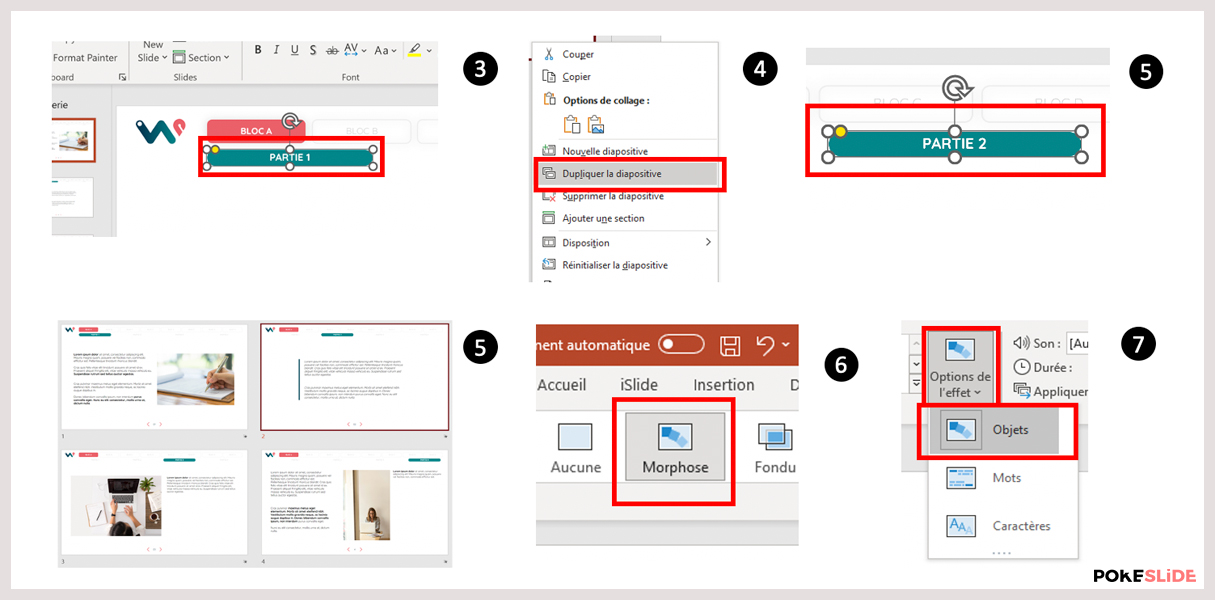
A progress effect adds information regarding chaptered progress of the presentation through a moving cursor over several slides. The current slide will have a title highlighted with a colored rectangle.

1. Create a new slide
2. On this slide, create the different titles for each of the parts
3. Place a rectangle behind the first part
4. Right click on this slide then Duplicate slide
5.On this new slide, change the position of the rectangle to the next part
6. In the transition tab, select Morph
7. In the Effects options, choose Objects
SLIDING EFFECT
A sliding effect allows you to move an important object from one slide to another by highlighting it.

1. Create a new slide
2. Once your slide is finished, create another new slide
3. Go to the previous slide and copy paste the object to highlight
4.You can change its size and position on the slide
5. Select the morph transition

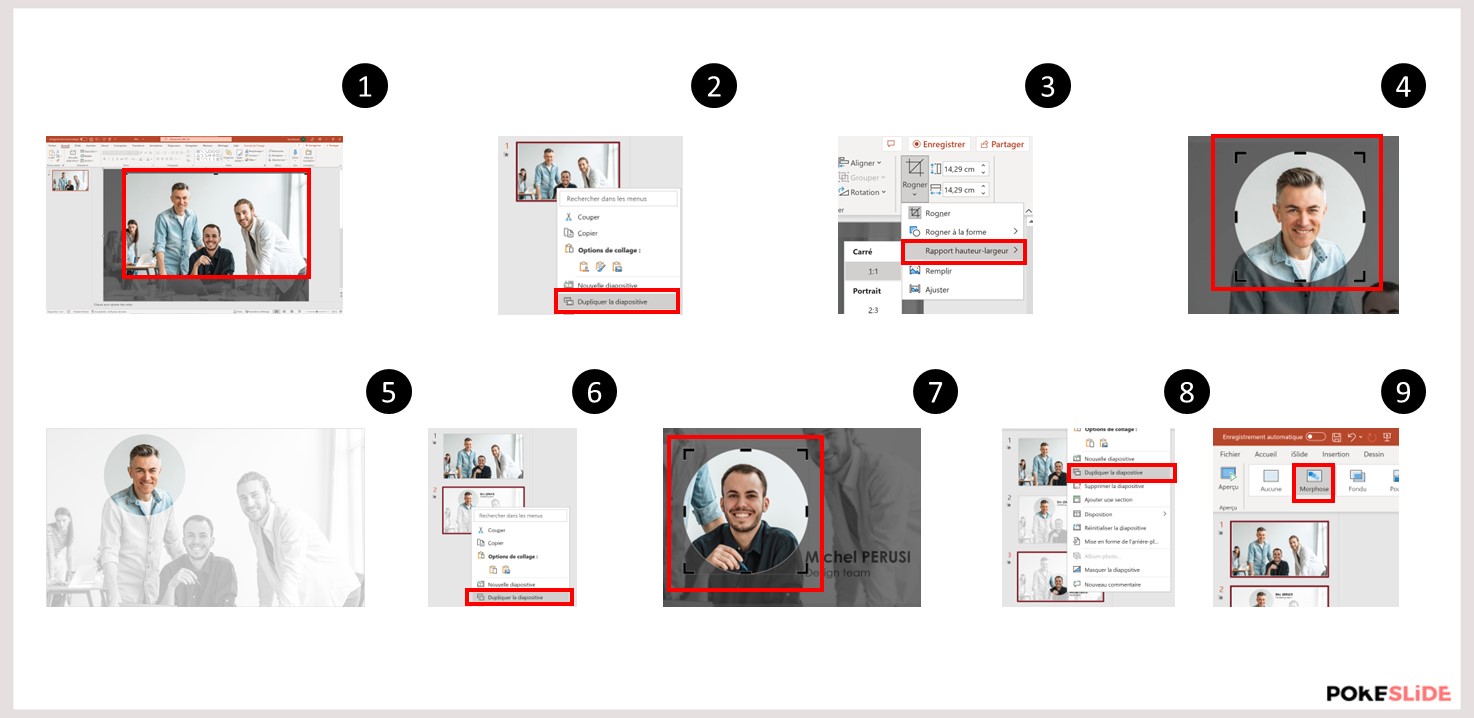
FOCUS EFFECT
A focus effect allows you to add a fluid transition between highlighted elements on a slide.

1. Create a new slide
2. On the slide, put a photo in full screen
3. Duplicate this slide and duplicate the photo
4. Replace the duplicate picture above the first, to have the same position
5.Crop the picture into a circle and center on the person’s face
6.Duplicate the slide and move the crop area to the next person
7. Select morphing transition
